Showing posts with label diy. Show all posts

Wednesday, December 10, 2014

Gift Tags - Free Printable

Seasons Greetings from 
the Hudson Valley Etsy Team!
Our Holiday Craft Fair in Beacon is only weeks away.  Get ready to give with these fennec fox gift tags you can print at home.  Have your special persons been naughty or nice this year?


Click on link below for Naughty and Nice pdf
https://drive.google.com/open?id=0B4emWuO6AltReEc0eEZfWldyNXM&authuser=0

Instructions:
  1. Print out the downloaded file on a sheet of card stock
  2. Cut out each tag along the pale blue lines - use scissors, x-acto knife & ruler or paper cutter.
  3. Punch out holes with a hole punch or just attach to your gift with tape or glue. I also drew in gold marker along the edges for more decoration.


All images © Jody A Lee 2014
www.astudiobythesea.etsy.com
This gift tag sheet is for your personal use only
All commercial use of them or these images is prohibited


Happy Holidays!


Jody 

Monday, October 6, 2014

A Simple, DIY, Hudson Valley Wedding - Picking The Flowers

Whew! It’s been awhile. I got caught up with actually planning and having my wedding! Now I’m back to tell you how it went and what I learned, starting with the flowers. :)

There are an incredible number of options when choosing wedding flowers (or you can choose not to have any). Do you want some for every table? Every person? Or just the bouquet for you? Which florist? What types of flowers? Colors? Are you going to preserve them? The questions go on and on!


If you have decided you want to have someone else design your flowers, you might want to skip the florists and go straight to a flower farm. There are several in the area with many options and some of them will design the flowers for you or know someone who will. This way, you also know your flowers grew locally, seasonally, and even organically depending on the farm. Shoving Leopard Farm even has an option where they grow a bed of flowers just for your wedding if you let them know by December.


For me, I went straight to the DIY approach to save money, and because I wanted a simple, casual feeling that is sometimes hard to find with florists, and in-season flowers were also important to me. I also turned out to be pretty good at it, if I do say so myself!

on the way to the venue! flowers are very distracting while driving, by the way. (photo by Thomm Quackenbush)
If you choose this approach, you still need to figure out where to get the flowers. You can look at flower farms like I mentioned before or look into bulk flower sellers online - this can be a bit pricey but you do end up having the largest number of flower options so you can be pickier about colors or if there’s a specific variety you just have to have.

photo by Daniel Evans

You can also try and grow your own flowers. I tried this and got mixed results, due to the weather and some fencing complications that pushed back when I planted my seedlings. I ended up not having nearly enough flowers by the wedding (I've got a ton now, though!) so I had to get some flowers from elsewhere. However, I did get a ton of pansies that I made ice cubes with that gave the water a slight cucumber taste while looking great, too! So that was a success, and having a few flowers I grew myself making a showing in my bouquet and the other arrangements meant a lot to me, so I’m super glad I tried - plus one of my dahlias finally blooming greeted me when I got back from our honeymoon.

photo by Daniel Evans
Another way you could go is to stop by a pick-your-own farm to pick some flowers. You could even make a day of it with your bridal party! This is the way I went when it turned out I didn't have enough flowers. Most places only charge around $10 for a bucket full of flowers and I only ended up spending around $40 in total. If you go this route, pick them as close to your event as possible and do your picking in the early morning or evening on a cloudy day for the best results. If you have access to a cooler, you might want to pop the flowers in there once you get them home. If not, a dark cool place would be fine. I only ended up putting my bouquet in the fridge once I made it to keep it fresh.

bottles actually used to be for clam juice!
Finally, you can just buy flowers from the grocery store. Some places like Sam’s Club will even have discounts on old flowers that might have a few bad stems, but are generally good. This way is probably the riskiest if you want specific flowers or colors, as they might only have a small selection - but if you’re just looking for roses and carnations or have a seasonal color palate (think oranges and reds around fall and pinks and yellows for spring) this might work out great for you


Now that you've got your flowers, how will you arrange them? There are a ton of great resources online for flower arranging, but, if you’re doing them all yourself, time will be a huge factor, so the simpler the better. For me, I started with my bouquet by simply working in a circle until I had about what I wanted and then taped it up with green floral tape and trimmed the stems. After that, you might want to use ribbons around the base, but I think it looks great even without that.


Next, I designed the table flowers. I used pasta sauce jars and other bottles that I had been saving up, and a few actual vases as well. These, I filled with flowers, generally keeping to a color scheme or feeling for each one. Finally, I used the flowers that were too short for anything else to make the boutonnieres. Those I did like the bouquet, just smaller. And you know what you can do with the extra flowers that just weren't quite good enough or got bent? Save them for the flower girl to throw!

photo by Daniel Evans
As for preserving your flowers, I don’t know much - I just took pictures then added them to my compost pile. Still you can look into drying the normal way ( hanging them upside down) or look into something more interesting, like freeze-drying. You might just want to keep a few flowers pressed in a book, too, especially if you do scrap-booking - all you have to do for that is place the flower in a book and then weigh it down until completely flat, and then wait.

Thanks for reading!

Amber


Photo by Jun Ogata dress by Holly Mccabe

Tuesday, May 27, 2014

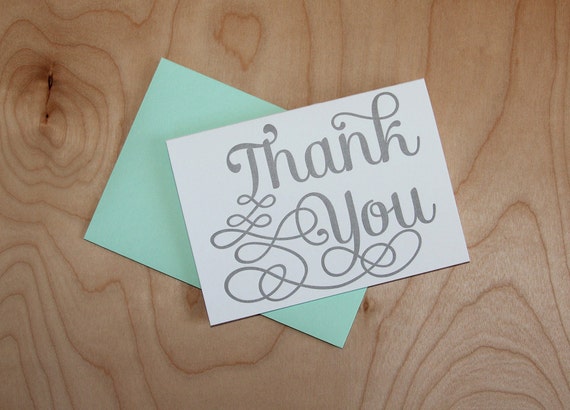
DIY Thank You Card

DIY Thank You Card
from the Hudson Valley Etsy Team

Here's a little Flower Garden thank you card you or the kids can easily make!  Just like those expensive cards you find in stores, it becomes three dimensional when you add your own selection of buttons.  All you need is a printer, glue, card stock paper, invitation size envelopes, buttons, a ruler, and a scissor or other method of paper cutting.  I'm not sure how I collected all these buttons, but lots of crafty people seem to have the same secret stash.  This is one way to make use of them!


Download card design free printable here:

https://drive.google.com/file/d/0B4emWuO6AltRSkdXZ1I2VHJ5djg/edit?usp=sharing

Print out full bleed if you can.  Otherwise the image will be short on the edges.  Cut in half.


Glue on buttons at the top of the stems.  Let dry.  Fold in half, and it's done!


Jody - astudiobythesea.etsy.com


Monday, May 12, 2014

In My Studio: Label Making

How to make your own Fabric Labels


In order to save money buying in professionally made custom labels I have been making my own. The results look great and are very easy and cheap to do. In this tutorial I give you the steps in order for you to make your own:


Materials

Printable transfer paper
Fray Check
Iron
Sharp scissors
Ribbon

Method
1) On your computer take a copy of your logo and insert it into a word document. Measure your ribbon and scale the logo so it will fit onto the ribbon. It will look best if the background of your logo is left white. 
2) Once its the correct size click the 'format' tab at the top of the word document. Find the 'rotate' tab and click the option 'flip horizontally'. This will invert your logo so that it will be the correct way around when printed.
3) Copy this version of the logo and paste in columns on the document (as below left). Print this document out onto the transfer sheet making sure you print on the correct side of the paper. Cut into strips (below right)

 4) Heat the iron to its hottest setting and iron one strip of logos onto the ribbon. Make sure the iron gets really hot and then before it cools down quickly remove the backing paper.


 5) Apply the fray check to the back of the ribbon in the area between the logos and leave to dry.

6) Once dry cut the labels

7) Apply the labels to your products, remembering not to iron over the label once its been attached as this will melt it.


Good luck and good making!

Sarah Omura - So Handmade

Monday, January 6, 2014

A Simple, DIY, Hudson Valley Wedding - Intro

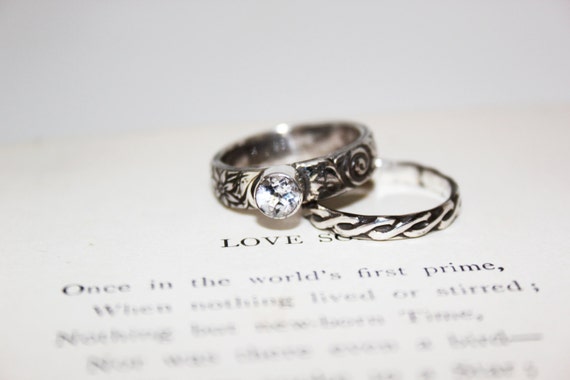
Flower and Spiral White Topaz Engagement Ring Set by Moonkisdesigns


To be honest, I've been planning my wedding to Thomm in my head for the past two years - and who can blame me? Weddings are gorgeous! Any excuse I have to look at wedding paraphernalia is good enough for me. But recently, we settled on a date and an engagement ring, so now I'm starting to get into the logistics of holding an actual wedding, which can be a bit overwhelming.

For those of you who don't know, the Hudson Valley is one of the most expensive places to get married. Pretty much anywhere around New York City has an average wedding cost of $30,000-$45,000, although most people get married for less than that, and the biggest weddings may throw off the scale. Chelsea Clinton's wedding in Rhinebeck cost 2 - 5 million, but another recent celebrity wedding between Kristen Bell and Dax Shephard only cost $142 including gas (this wasn't in the Hudson Valley, though). Still, no matter your price range, it's almost impossible to get around the fact that in weddings can be very expensive, both in time and money, and the little things add up fast. 

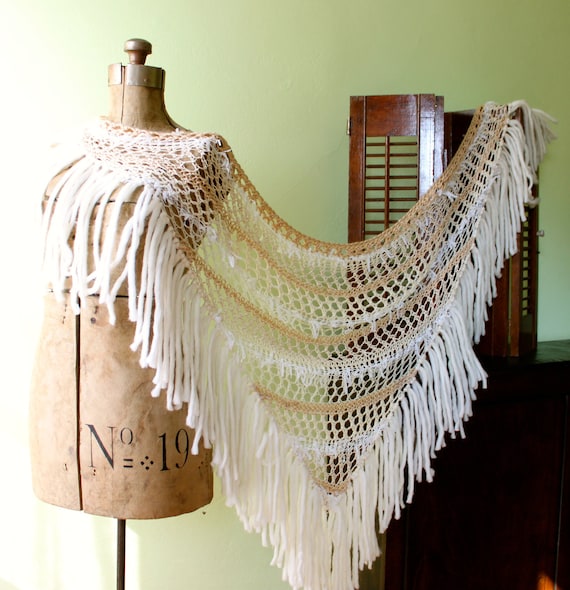
Wedding Shawl Bridal Accessory white ivory natural by MollysPurl
Now most advice you get on how to hold a "budget" wedding involves cutting your guest list, going off-season, only serving desserts, hors d'oeuvres, or breakfast for the reception. Most DIY books simply show you how to make cheap crafts rather than recommending creative ways to feed people, get them to dance, and get those photos shot. (However I did just read A Practical Wedding by Meg Keene and, aside from making me cry repeatedly, it goes into those sorts of things). On top of that, there’s ton of professionals telling you about the horrors of DIY and everyone from your family to complete strangers telling you what you need to make it a real wedding or how your guest won’t have any fun without a full bar. Some of those people do have your interests at heart, but others just like being bossy or want you to hire them.

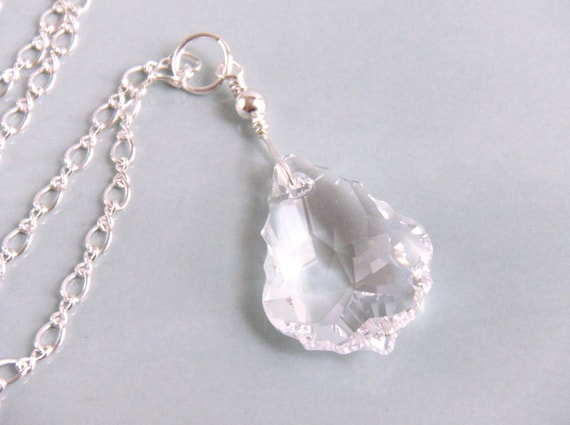
Baroque Crystal Pendant Necklace, Silver by merryalchemybridal
So if you have your heart set on those 100+ people, having a wedding while it's still nice outside, and feeding people real food, what are you going to do? First of all, I recommend figuring out what is most important to you and putting most of your money to that. For me, it's going to be the wedding venue and possibly the videographer, but, after that, I'm going to have to work twice as hard (or possibly 4x) to figure out how to get the most bang for my buck. Like I said, it's a huge time expense but that's worth it to me. Luckily, as I'm an artist, I'm going to get creative! I hope I come up with some ideas you haven't thought of for your own wedding. 

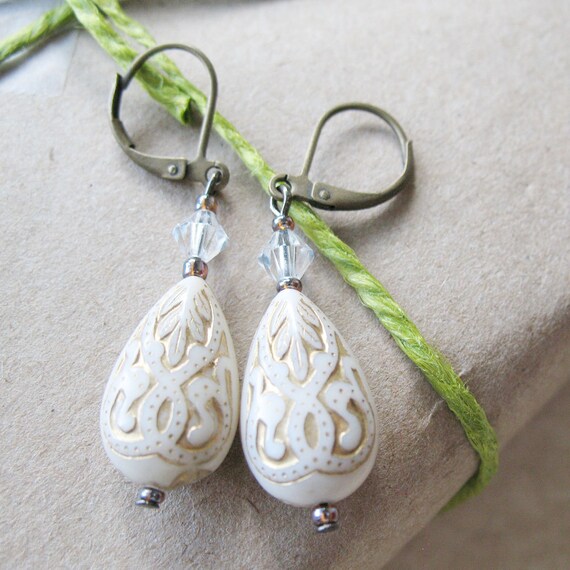
Holidays White and Gold Ornate Dangle Earrings by pulpsushi
Once you've decided on what's most important , figure out approximately what your budget is. This number can be as loose or as tight as you want it, but it should have some bearing on reality, so get an idea how much your family, or their family, is (or isn’t) wiling to contribute, and how much you and your fiance can contribute as well. Now, if that number turns out to be way more then you expected, don’t just start throwing your money around for the wedding willy-nilly! Just because you have the money doesn’t mean you’ll want to spend all of it or that what you’re spending it on will be worth it the day of. Also, if you’re not careful, you might go over-budget, even if it seems like way more money than you could ever spend on one day. I’m sure your family will be pleased if you don’t spend it all, or you can always save it for the honeymoon! Now, if it’s less than you expected, don’t fret too much yet. It will work out somehow and worrying will just drive you crazy and then you might just end up over-spending on comfort food and cozy blankets to try and relax.

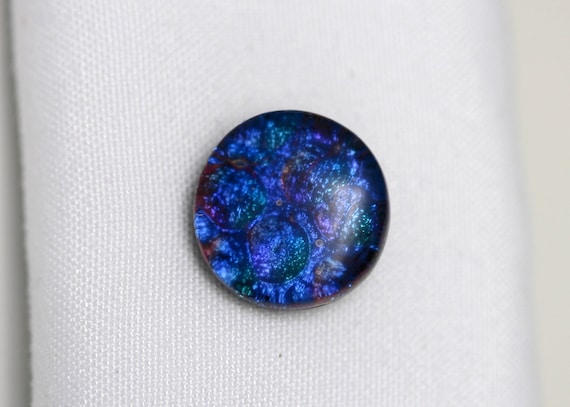
Blue Geek Men Tie Tack TC004 by GetGlassy
Finally, figure out what resources you have at your disposal. These aren’t just the objects you have that might help with decorating or serving your guests (though those help) but also includes any skills you and your friends have. These things might not actually save you money, but it will make things more personal and make your friends and family feel more involved. To do this, you really have to be the one to approach your friends and family. They may offer to help but you probably have a better idea of what you need. Most importantly, play to your helper’s strengths! If you have a friend who is awesome at baking, get them to bake something. Don’t ask them to help address invitations - that’s more of a job for someone with great handwriting. Keep in mind that, if you’rd asking someone to use a specialized skill, at least offer to pay for the materials they’ll use! This is especially true if they already are doing it professionally. You can ask how much they usually charge and they’ll probably offer to do it at a discount or for free as a wedding gift, but don’t expect it. They’re helping you out, so help them out as well. Also, you should be the one to bring up the money issue, as they might be too polite to and chances are you might forget when things start getting crazy later on, so they might have to remind you anyway. Although this might not save you much money, wouldn’t you rather show off a beautiful dress made by a friend than one picked up at a bridal salon? 

Dress by Holly Mccabe possibly available at Surviving Sisters' Boutique
 (Model: Amber Hawkinson, also Holly will be making my wedding dress)

Keep in mind items you can collect over time or borrow. For example, I already have a small collection of empty pasta jars I’ll be using as vases and my mom has a lovely white serving platter I intend to use for something. For this, you might just want to start keeping a list of things to ask to borrow later on, even if you’re not sure who would have it - you’d be surprised how many people have sound equipment sitting in their basements waiting to be used.

No matter what happens, whether things go exactly as planned or not, whether you spend hundreds or millions on the day, the important part is that you’re celebrating the love you have for one another and the uniting of a family of friends and relatives. Years later, you and your guests won’t be discussing how much they loved the deluxe porta-potty you sprung for, they’ll be telling stories about the toasts that were given, how much fun they had, and how the two of you just glowed while looking at one another.

P.S. If any you guys out there have any wedding suggestions, feel free to leave a comment! We could use all the help we can get.

Tuesday, December 24, 2013

Time To Wrap it up!

With the December holidays and New Year's Eve, there are lots of gifts to give. With the gifts come a lot of wrapping.  As retailers, we know presentation is the key.  You can make the simplest thing sparkle. I like to use gift packaging as a time to use what I already have.
via MarthaStewart.com
Original Artwork

  One of my favorite choices for wrapping are my kids drawings. A stick figure dinosaur with a santa hat -- who can beat that!  I have rolls of drawing paper for the kids to draw on endlessly.  I can find the best patterns and story lines to give people and my kids have fun doing it.  I also like to use watercolors and make my own artwork to wrap up a special gift.
via  Poppytalk
Scrap Fabric or Clothes

Not all shrunken or destroyed, worn out clothes make good rags, some may make great wrapping.  Also scrap fabrics are great for bows and decorations. Over at Poppytalk they show a great tutorial on making a printed fabric for tying up your gift.

via Grey Likes Weddings
You can cut up that moth eaten sweater and sew a gift cozy! At Grey Likes Weddings they show you a reuse of a sweater for a wine cozy. A great way to use the sleeves of your worn out knits.
 A great alternative for those who are not stitchers would be the Japanese Furoshiki wrapping method. It involves tying knots to secure the package in a beautiful way.  Uniqlo has a lovely video on Furoshiki wrapping.
via How About Orange
Simple Everyday Materials

If you look around there is always something you can find -- from newspaper, kraft paper, cardboard, containers -- that with a little paint, thread, yarn, stamping, hole punching, and cutting can become the perfect presentation for your gift.  It's almost a gift on its own.

There's a great tutorial on creating a bow from magazines with newspaper wrapping at How About Orange.


Reuse, Create and Give!
Happy Holidays!

Karen - Lark Practical

Monday, July 8, 2013

DIY Leaf Pincushion Pins

 Leaf Pincushion Pins Tutorial

For all you crafters who sew, or know someone who sews, here's a little way to green up your pincushions!

Materials:

Sculpey
x-acto blade or even a toothpick will do
foil
flat top pins or needles from the dollar store


Choose or make various shades of green by mixing the ready made colors with white or clear sculpey.  Just knead the two shades together until blended.  Roll into a tube, and cut some slices.


Make a leaf shape of a slice by rolling it into a ball, flattening it, and pinching one end.  Push in the pin or needle, and push the clay back onto the puncture so it's sealed.  Its nice to have decorative pin heads that are flat, as they are easier on the fingers and okay to iron over.


Gently press the x-acto blade or toothpick onto the top of the sculpey to make the veins of the leaf.


I got some leather punch tools to press into my sculpey pins as well!


 Place or even make the pins right on top of a small piece aluminum foil.  That way you don't even have to move them after you've formed them, which usually distorts their sides.  Bake at 275 degrees for 10 minutes and they are done!  So simple and fun!

Easter Egg by Vanessa of the Pudgy Rabbit
The Garden Party Tortoise goes on his way to new projects


Jody
www.astudiobythesea.etsy.com

Wednesday, April 24, 2013

DIY: Matting & Framing Art


DIY: Matting & Framing My Fantasy Art
Part 3

Tools and Materials

DIY metal frame 
Picture hanging wire (any wire will do, even tough string)
screwdriver
duster
matted artwork
plexiglass
wire cutter
Plexiglass

This is the final part of the tutorial.  Previously I had completed the matting of the art, and now I assemble the frame and put the artwork in it.  I buy my frames from American Frame, Graphic Dimensions, and sometimes from the art suppliers like Dick Blick, Pearl Paint, or AI Friedman.  I like American Frame because most of the time I'm framing artwork for conventions and I expect the art will do some traveling before it sells, so I prefer metal frames for toughness. I use plexiglass, which American Frame will cut for you as well, instead of glass because it is much lighter, and may crack but not shatter as glass will.  I like color in my mats but a clean, austere look in my frames.  


I assemble the frame as per the instructions, leaving the top open for insertion of the art.


I insert the corners at the top and the piece for hanging wire about 5" down.


I dust off the top of the matted artwork so there is no lint.  The plexiglass comes with sticky paper on both sides. I peel off one side and place it quickly on the matted art so there is minimal chance of getting dust on that side.  Then I peel off the other side, revealing the artwork.  I scan for lint and specks.  If I find anything, I carefully lift the plexiglass and use a bit of masking tape on a finger to trap the lint and remove it.


 Now I'm ready to slip the matted artwork and plexiglass in together into the 3 sided frame.


And slip in the final top side of the frame.


I turn the whole piece over and screw the sections in tight.


I don't know the technical name for these curvy things, but they apply pressure between the frame and the backing board to keep the art in place.  Slip them in along the edges, about 4 or 5 to a side.


They don't fit in all the way, and they occasionally pot out, but they do the job.


 Cut a length of wire about 4" longer than the width of the frame and put them through the holes of the frame's wire hangers.  Wrap the ends around the wire.


Finished and ready for show!


Jody

www.astudiobythesea.com
www.jodylee.org

[Etsy+avatar.jpg]